Introduction
It is difficult to count the times I wished I had remote access (via Internet) to my PC while being away from it and I am sure every power user has been in this position.
In the usual case where the PC is powered off, there are two distinct problems for achieving this:
- Powering on the PC
- Establishing a remote connection to it from an accessible nearby device
Starting from the second one, today, luckily, it has pretty much been solved. Reliable services offer full remote PC access from another PC or a smartphone. All somebody has to do is install an application like teamviewer, set a strong password and adjust it to start with windows. At this point he can be confident that if the PC is powered on, he can access it. This takes us to the first problem: remotely powering the PC on.
Wake on Lan (WoL) is a technology that allows a computer to be turned on or woken up when it receives a special network message(called magic packet). If the magic packet could somehow make it from a remote node to the target PC via Internet, it seems to be exactly what we are looking for. Unfortunately there are some serious drawbacks:
- It requires a motherboard that supports WoL.
- WoL is not supported from all S states. Practically that means it will only work from sleep or hibernate state and not from shut down state.
- If behind router, it requires proper setting of port forwarding rules, for the magic packet to reach its final destination and, even then, is not guaranteed to work with any router.
- There are very few, if any, wireless NICs with WoL support.
- It requires the user to know the internet side (external) IP of the target node. This makes it highly unreliable as most users opt for dynamic IP which may change anytime by the ISP. There are some workarounds like DDNS services but this adds up to more hassle.
- WoL protocol by itself provides no feedback hence there is no easy way to tell if the target node was actually turned on or not.
Overall, WoL over Internet is considered unreliable and is a cause of a lot of frustration. This is why I came up with a much more reliable way of remotely powering on a PC, which also does away with all of the aforementioned problems and provides soft realtime feedback. The name of this concept is WoL++.
WoL++ Overview
The system consists of:
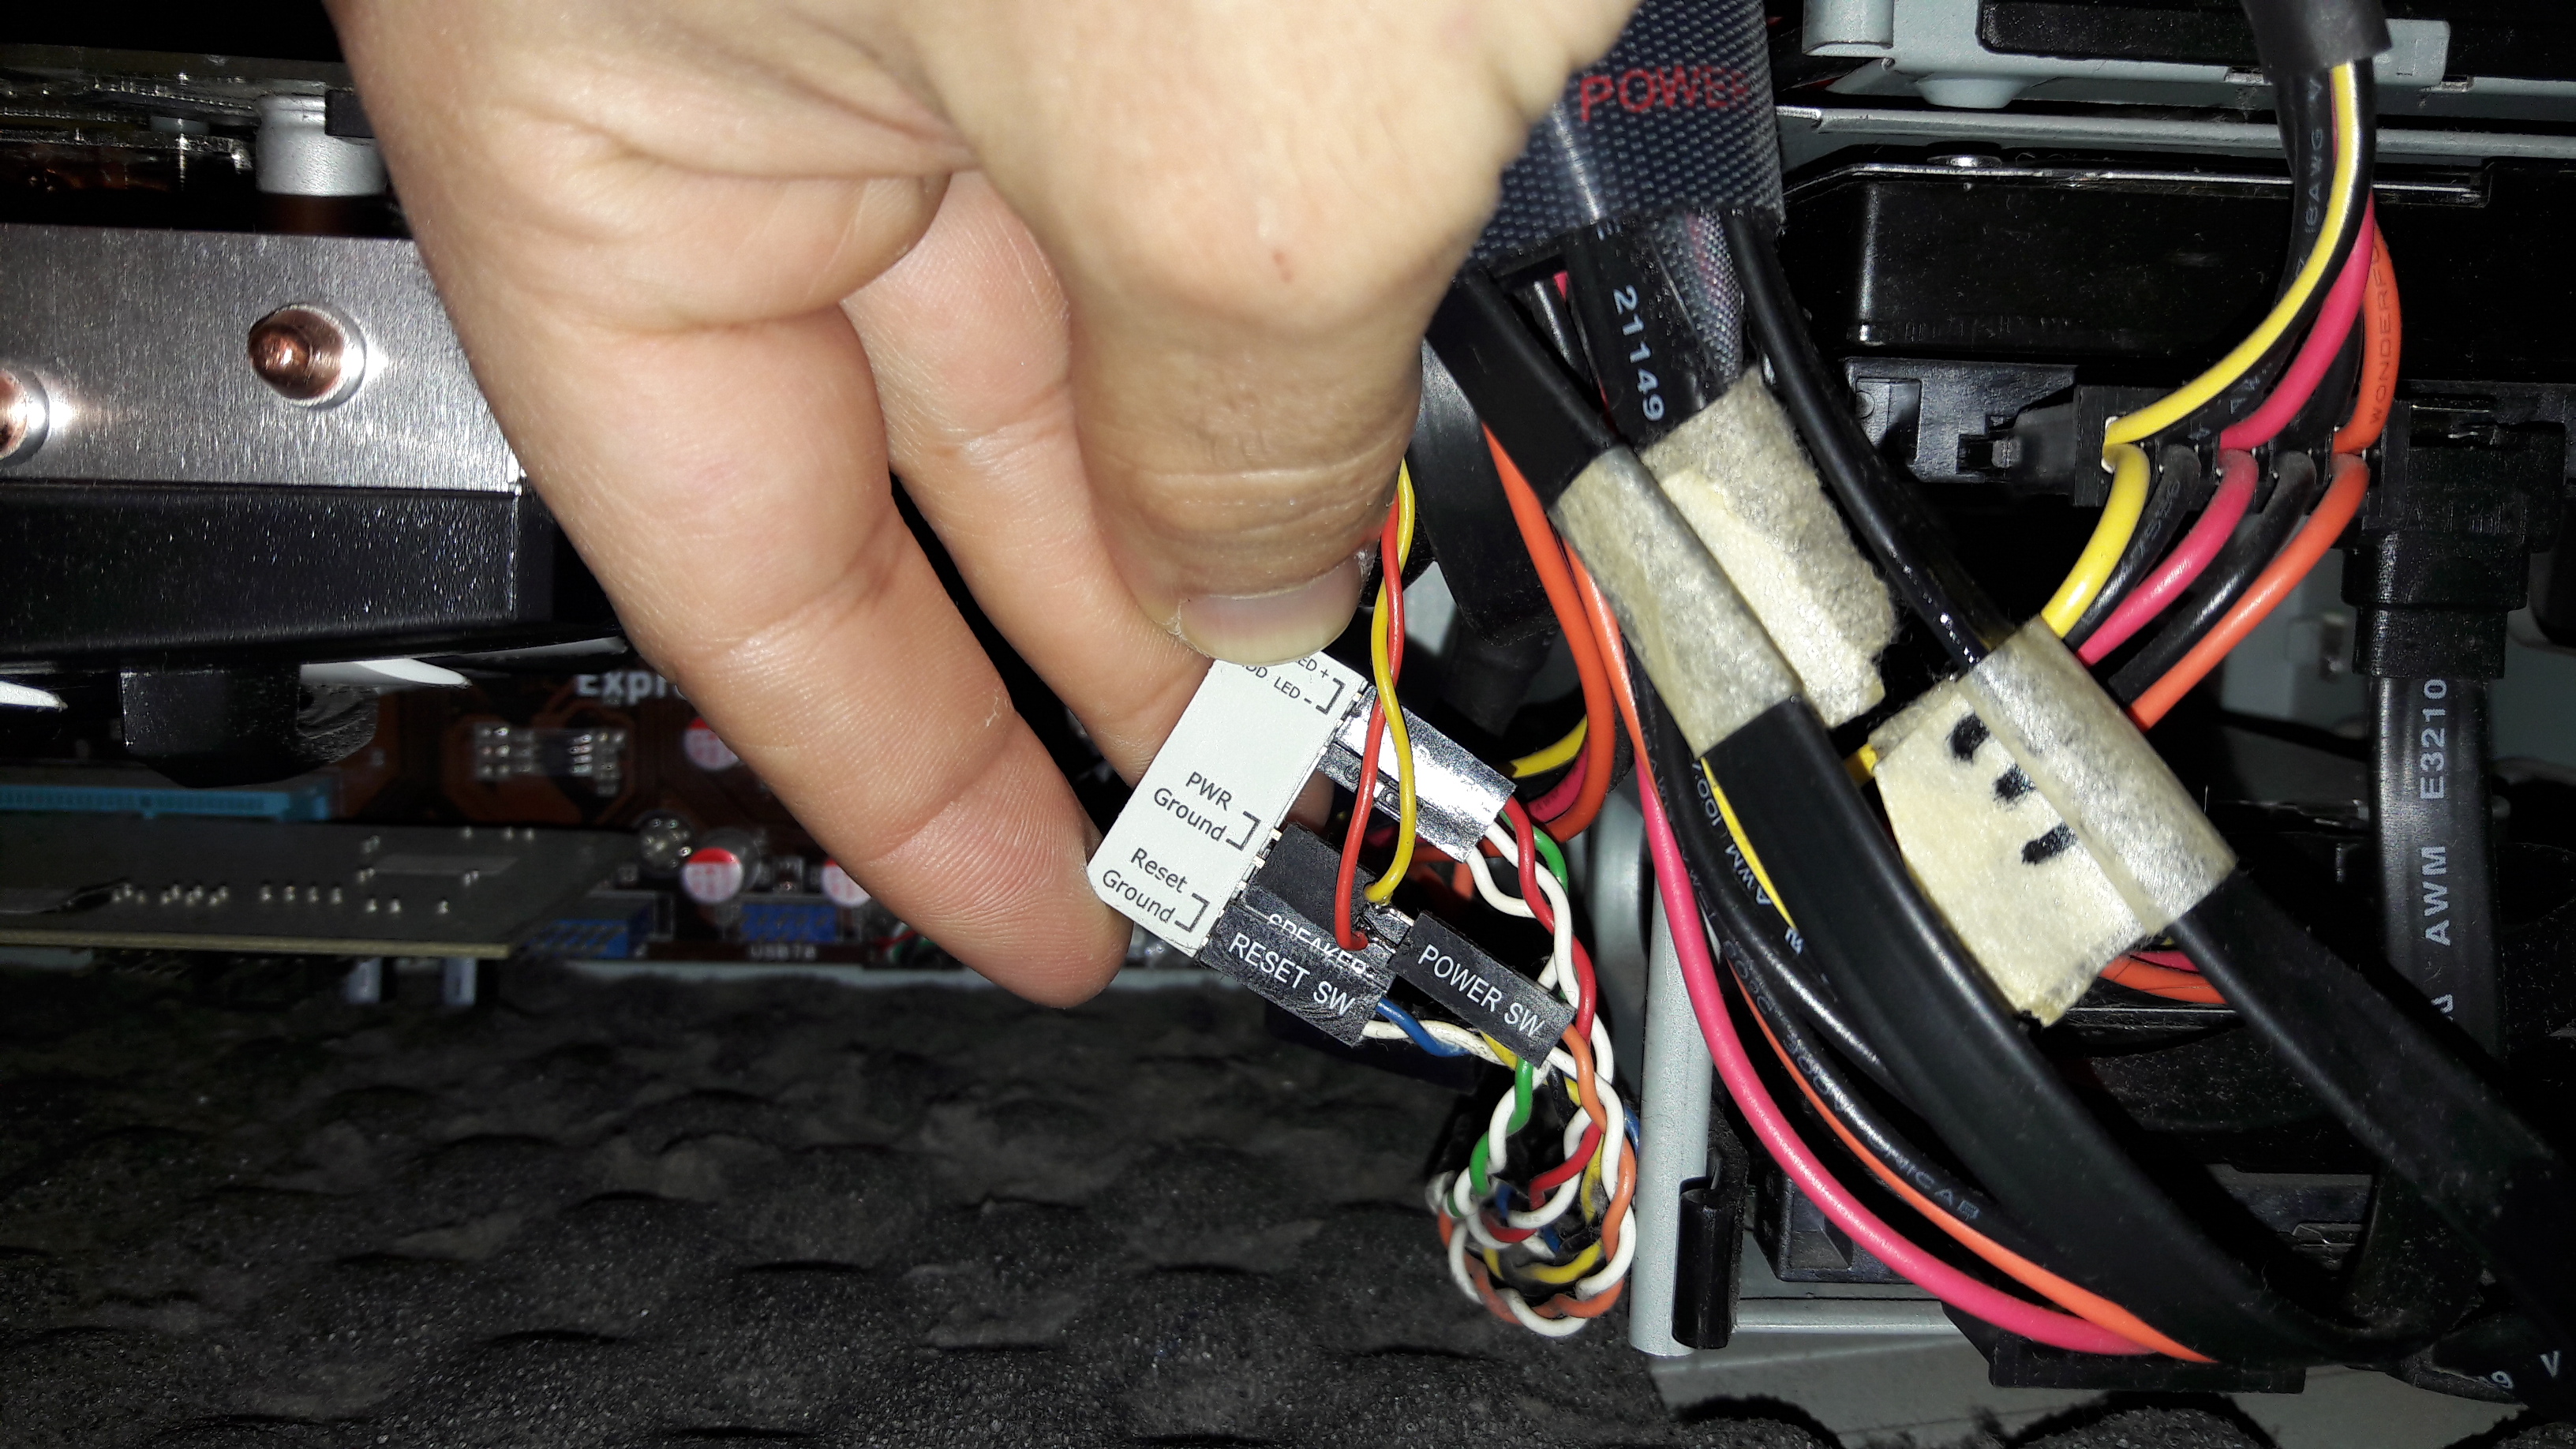
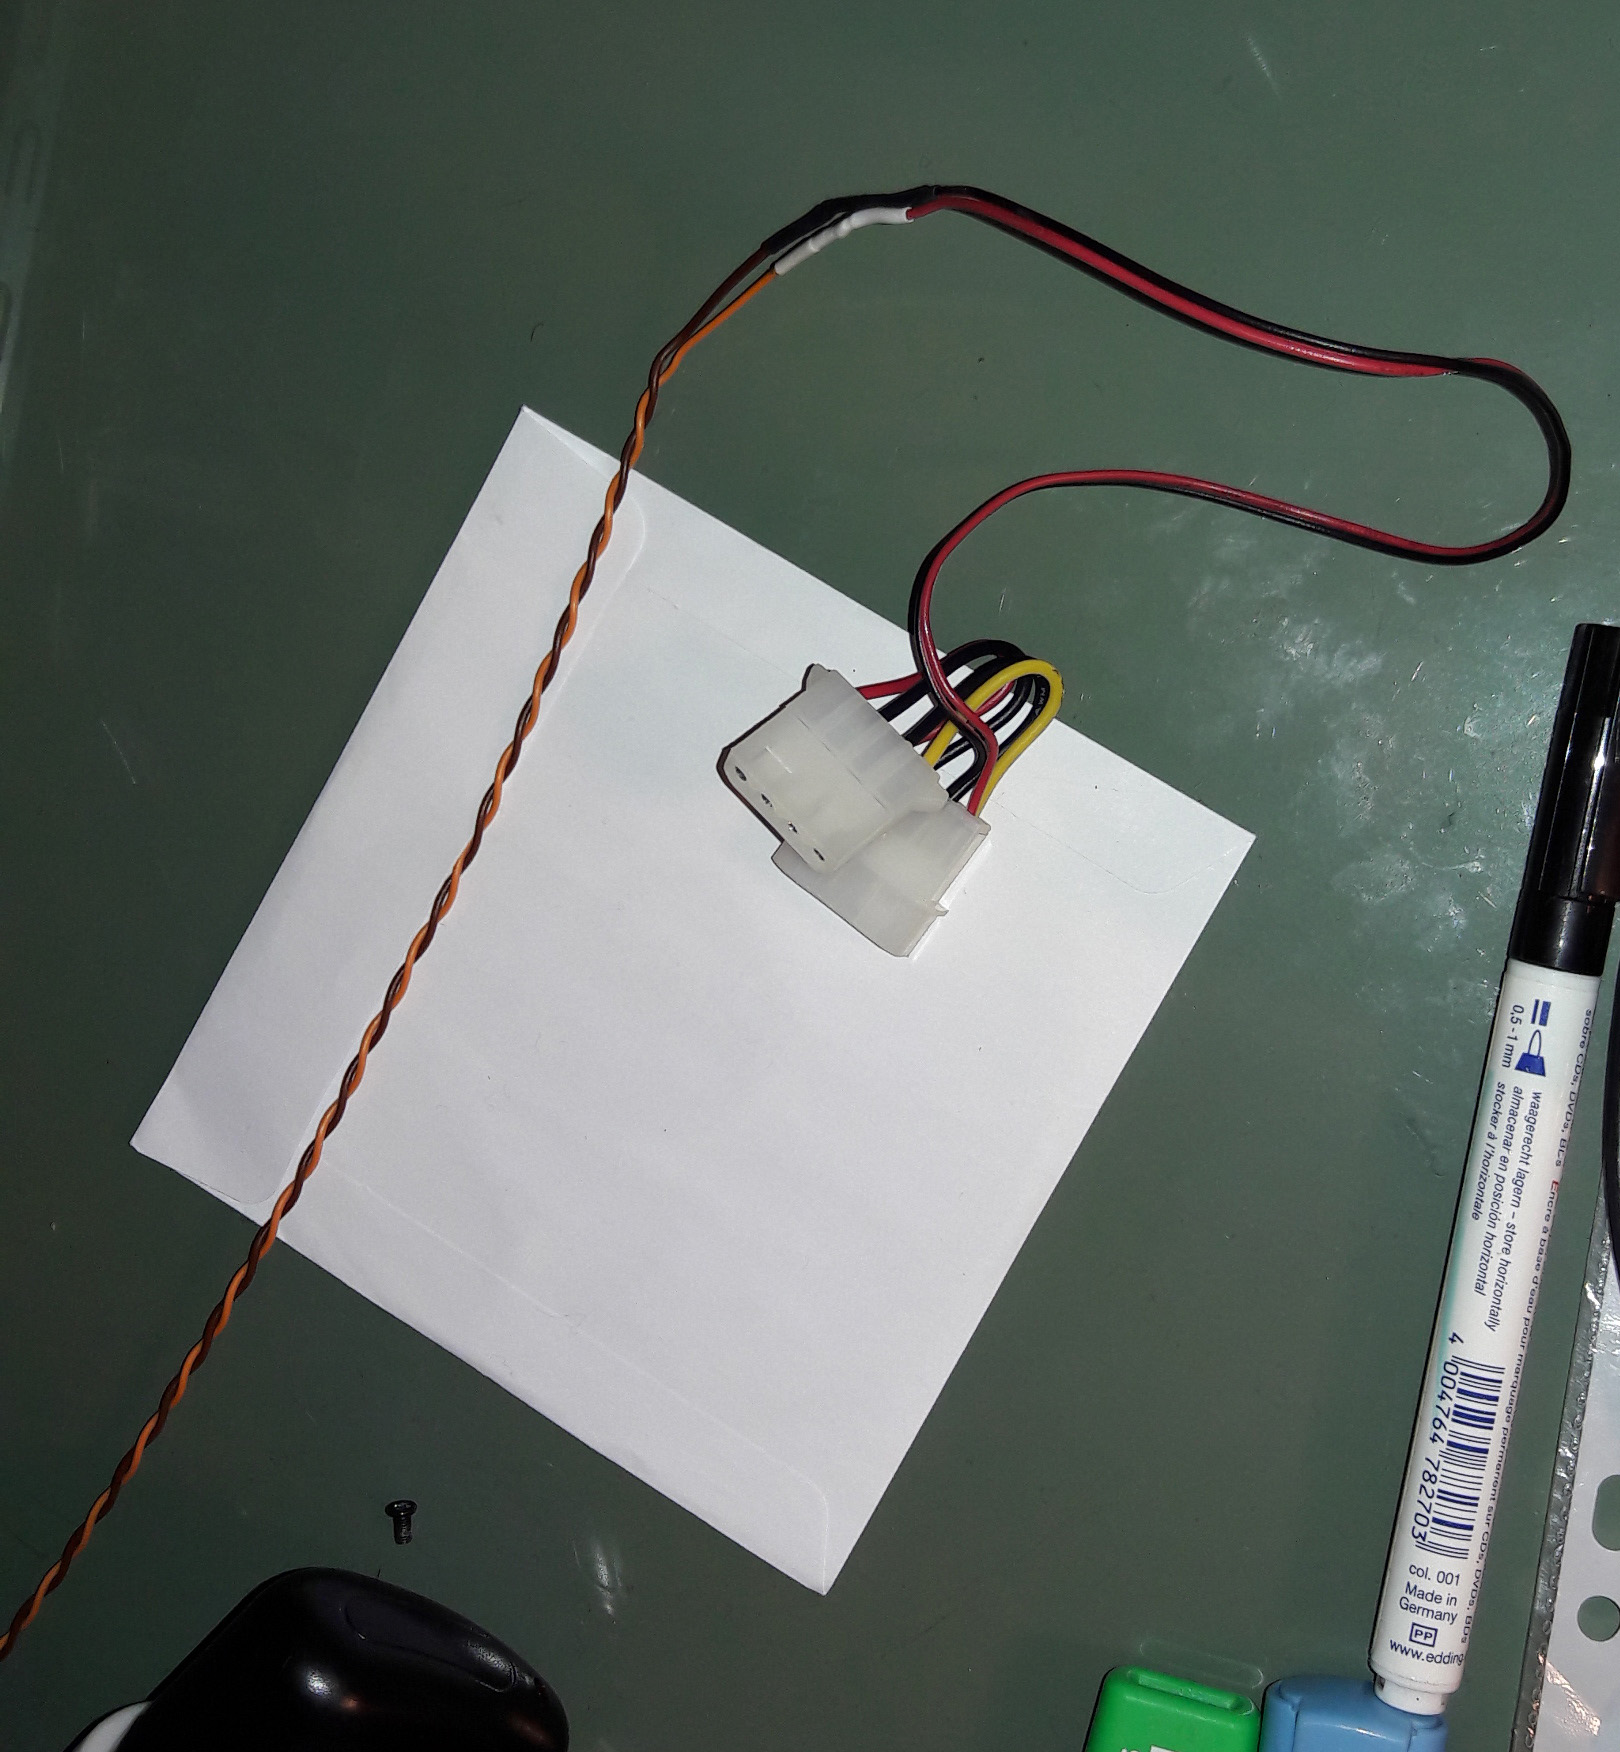
- an ESP8266 SoC, electrically connected to both power and reset switch pins on the motherboard of the target PC as well as to the 12V power supply of a molex connector coming from target PC’s power supply.
- the client application: used by the remote user to trigger some action remotely on the PC. It was developed as an android application
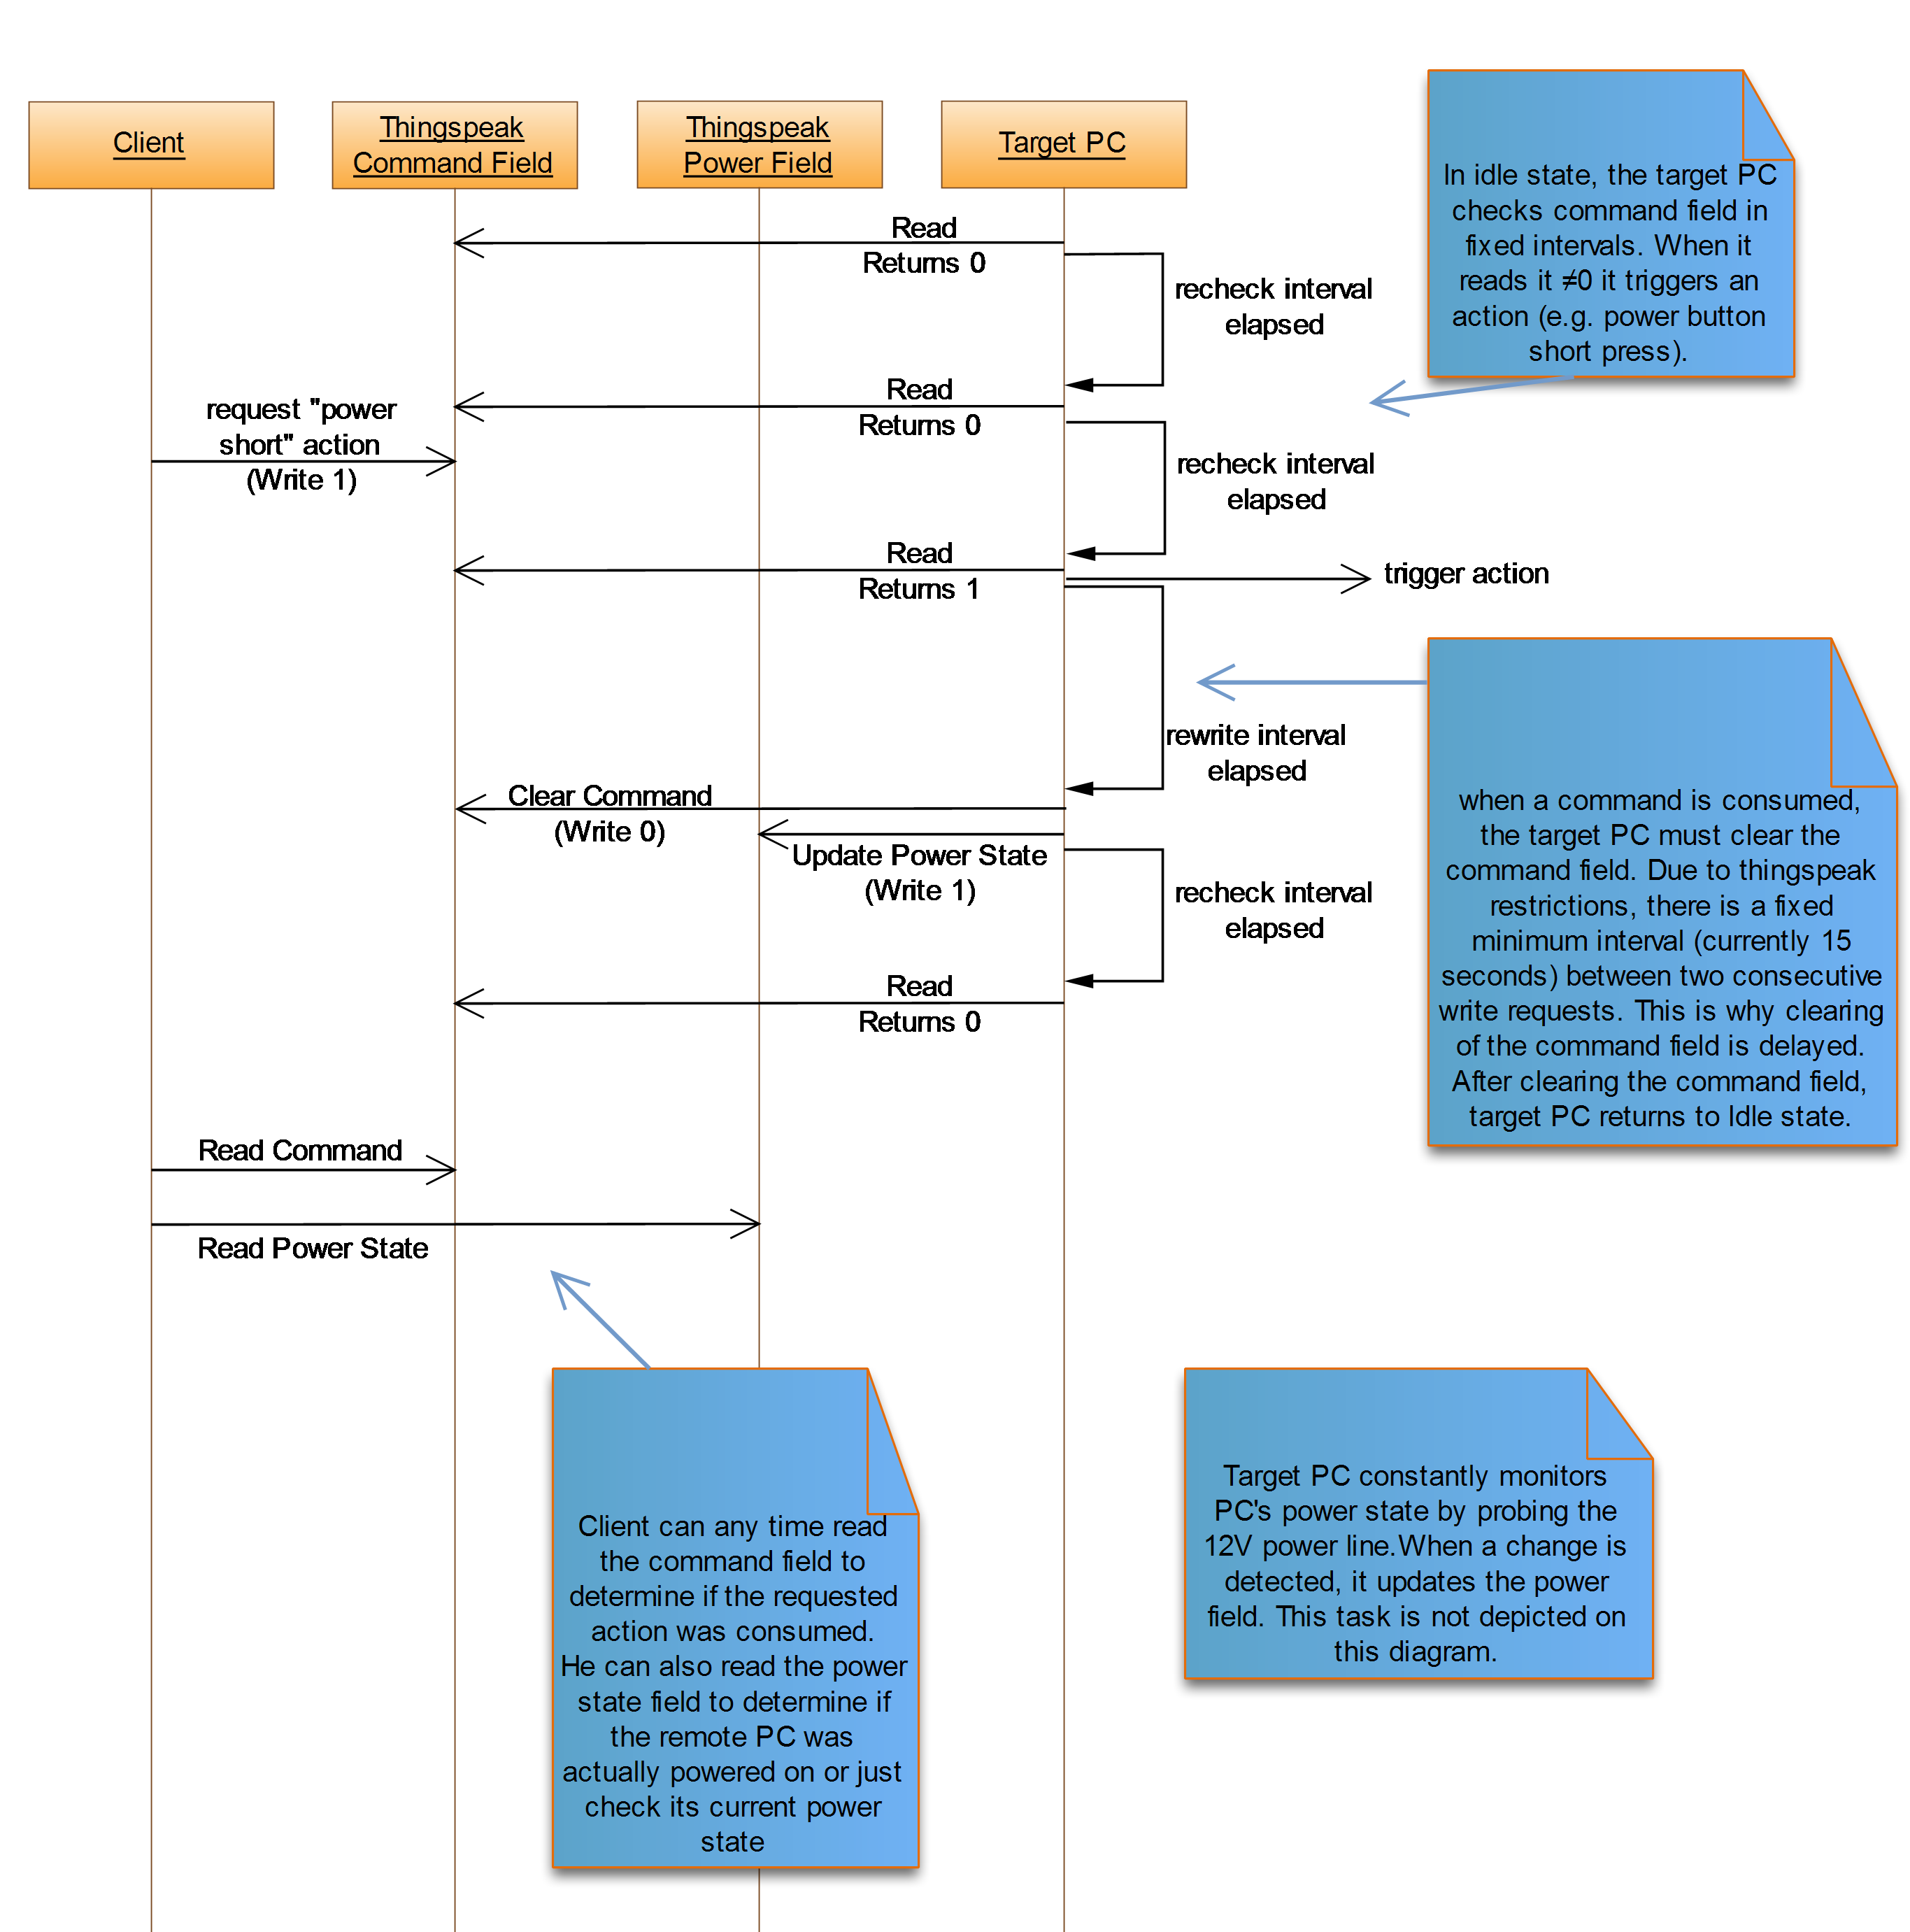
The key detail of the system is that its constituent parts do not communicate directly with each other but only via an IoT service, namely Thingspeak. In its basic form, thingspeak service provides user with cloud-stored variables which can be CRUD-ed in a RESTful way with simple HTTP requests from anyone who has an appropriate API access key. Two of these variables (called “fields” in thingspeak’s terms) were utilized. One, namely the “command” field, for the client to send action requests to target PC and one more (the “power” field) for the target PC to expose its current power state as a feedback for the client.
The command field can have any of these values:
| Value | Meaning |
|---|---|
| 0 | Idle |
| 1 | power button short press pending |
| 2 | power button long press pending |
| 3 | reset button short press pending |
and the power field can be either 0 (power off) or 1 (power on).
Unlike traditional WoL, there is no need for special motherboard, NIC or router nor any static IP or DDNS service. The system also works fine with a wifi-connected (or even an offline) PC which can be powered on from any S state. Only things required are physical access to motherboard, wifi internet access and a USB power supply for the NodeMCU module, although, in most cases there is no need for a dedicated power supply, as the module can be powered directly from an Always On/Powered USB port of the PC, if available.
The sequence diagram below depicts a typical interaction scenario assuming both used fields are initially set to 0.
Electronic circuit
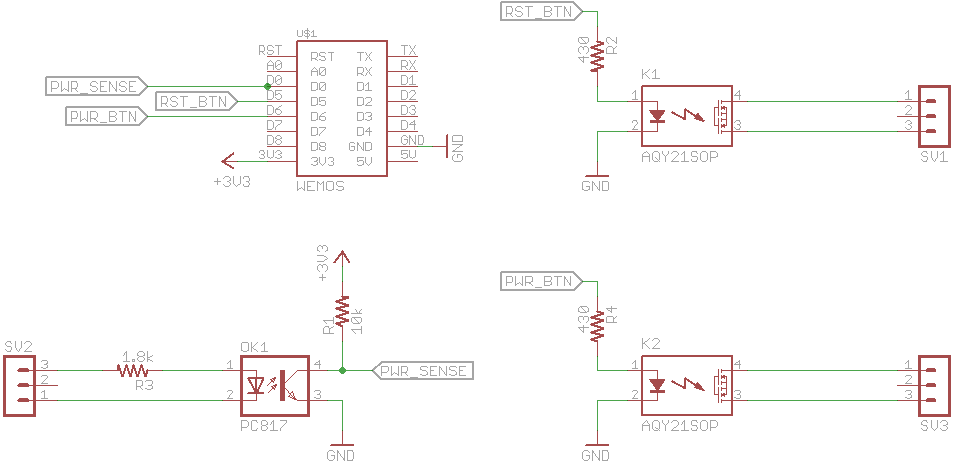
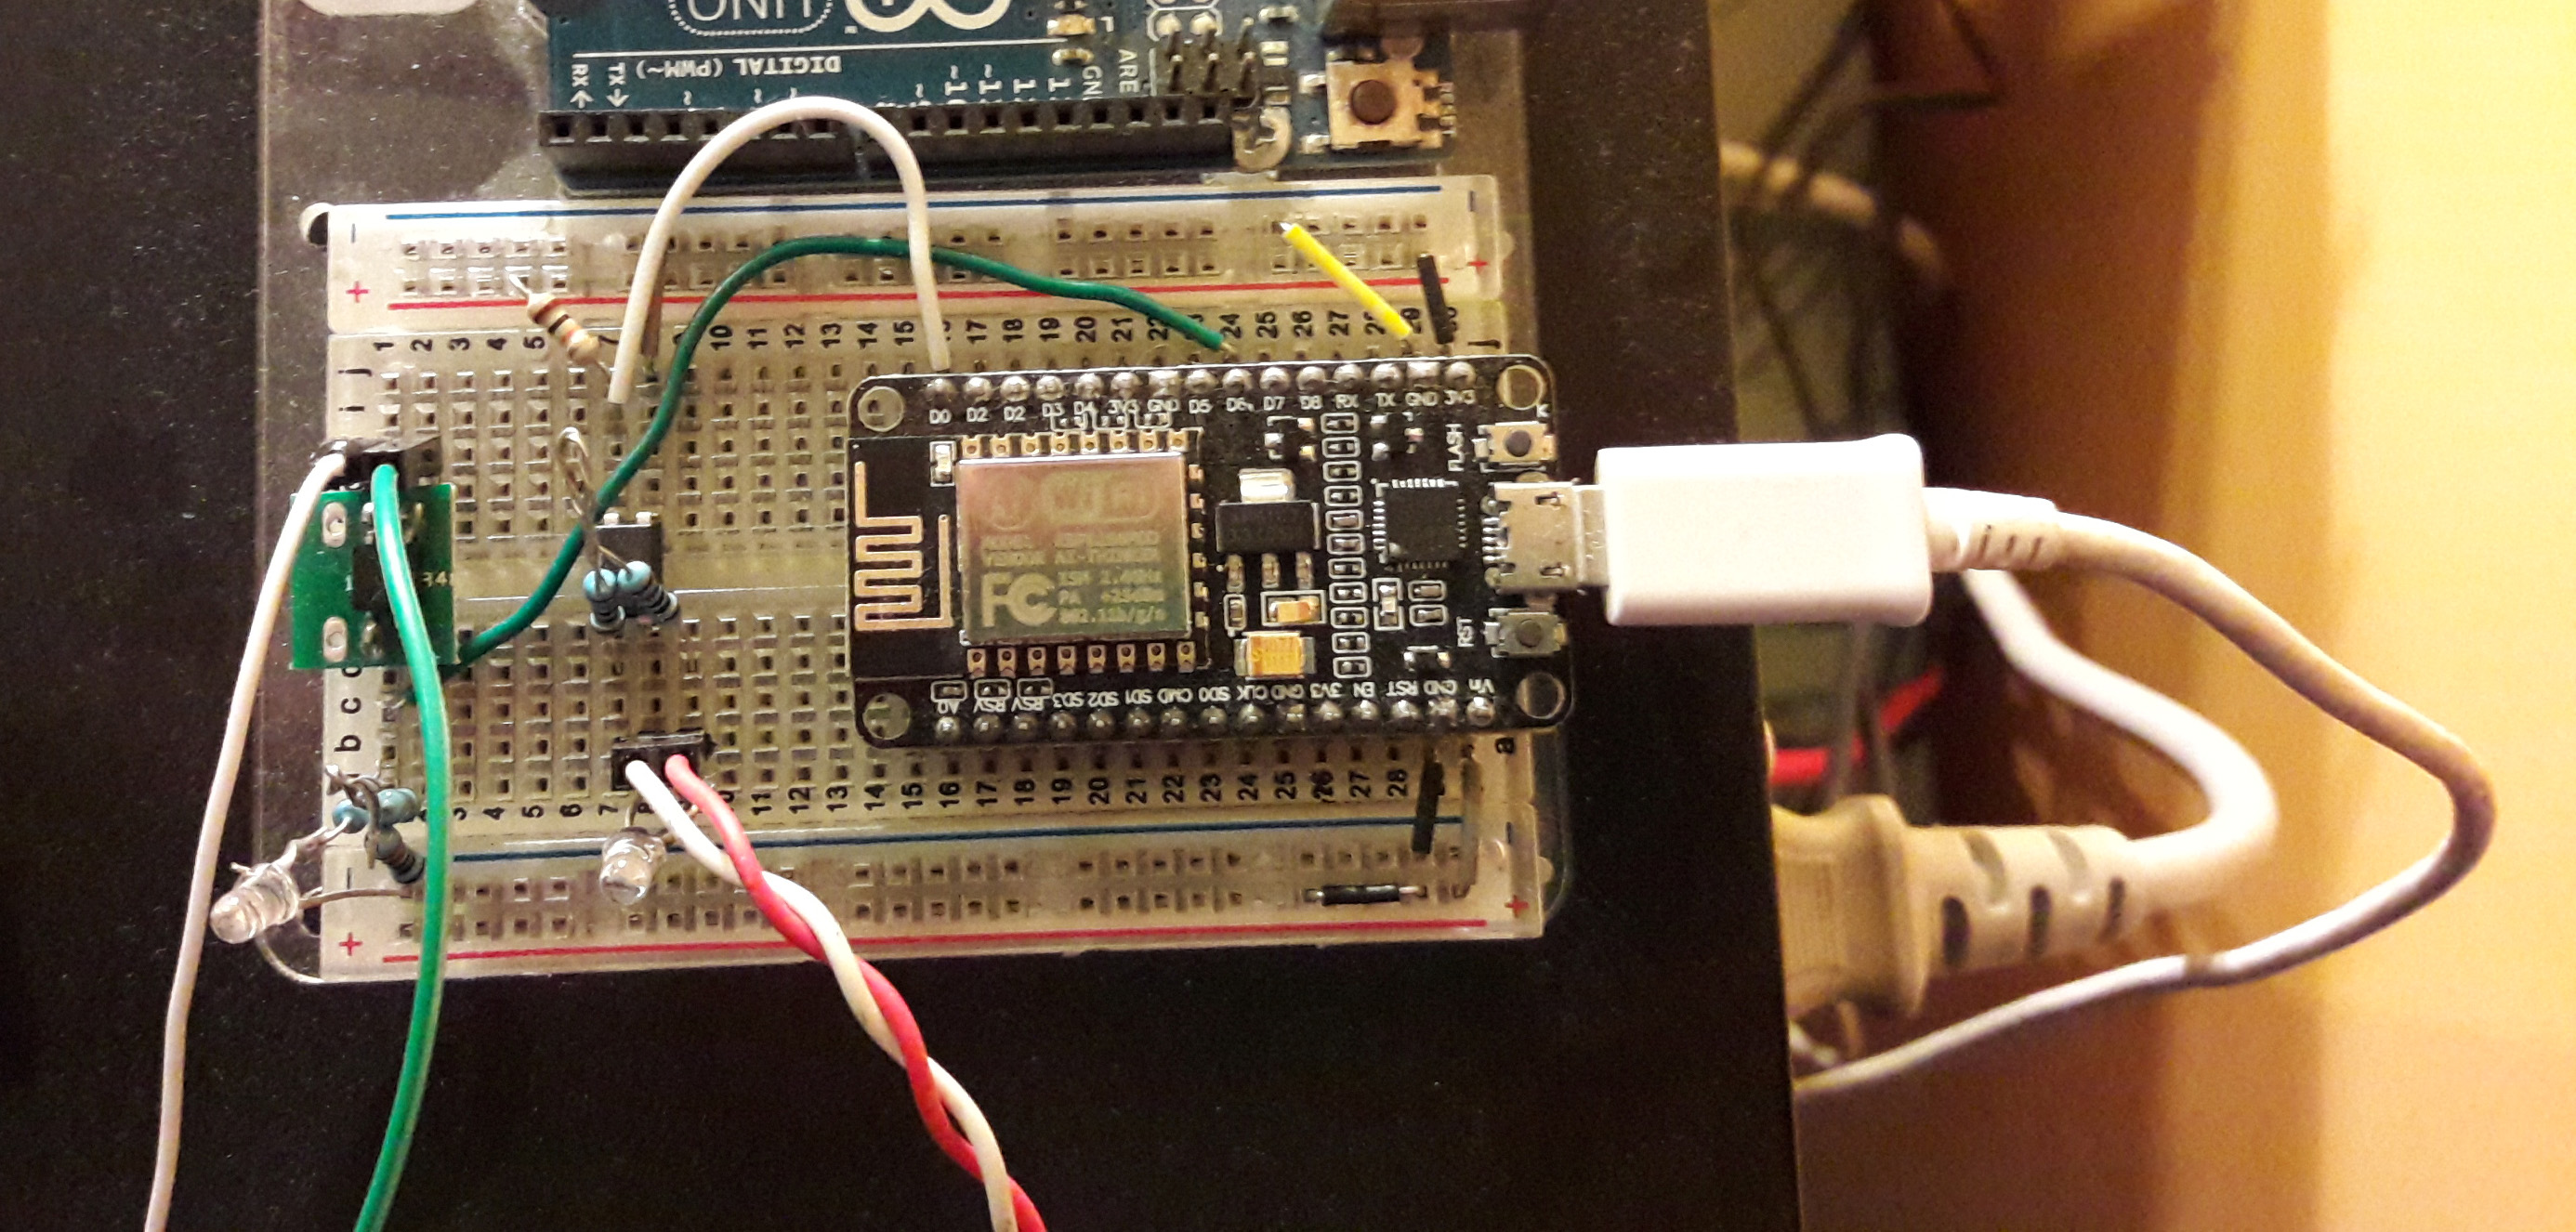
The electronic circuit built to interconnect an esp8266-based module with the actual PC on the “target PC” side is shown in the schematic below. The circuit was designed to be electrically isolated from the PC. The power sense is being done via an opto-isolator. For interfacing with the power and reset buttons, two small ssr’s were connected to the motherboard, in parallel with the power and reset hard buttons. In this way, they not only provide the required electrical isolation but also eliminate the need for specific polarity connection with the motherboard.
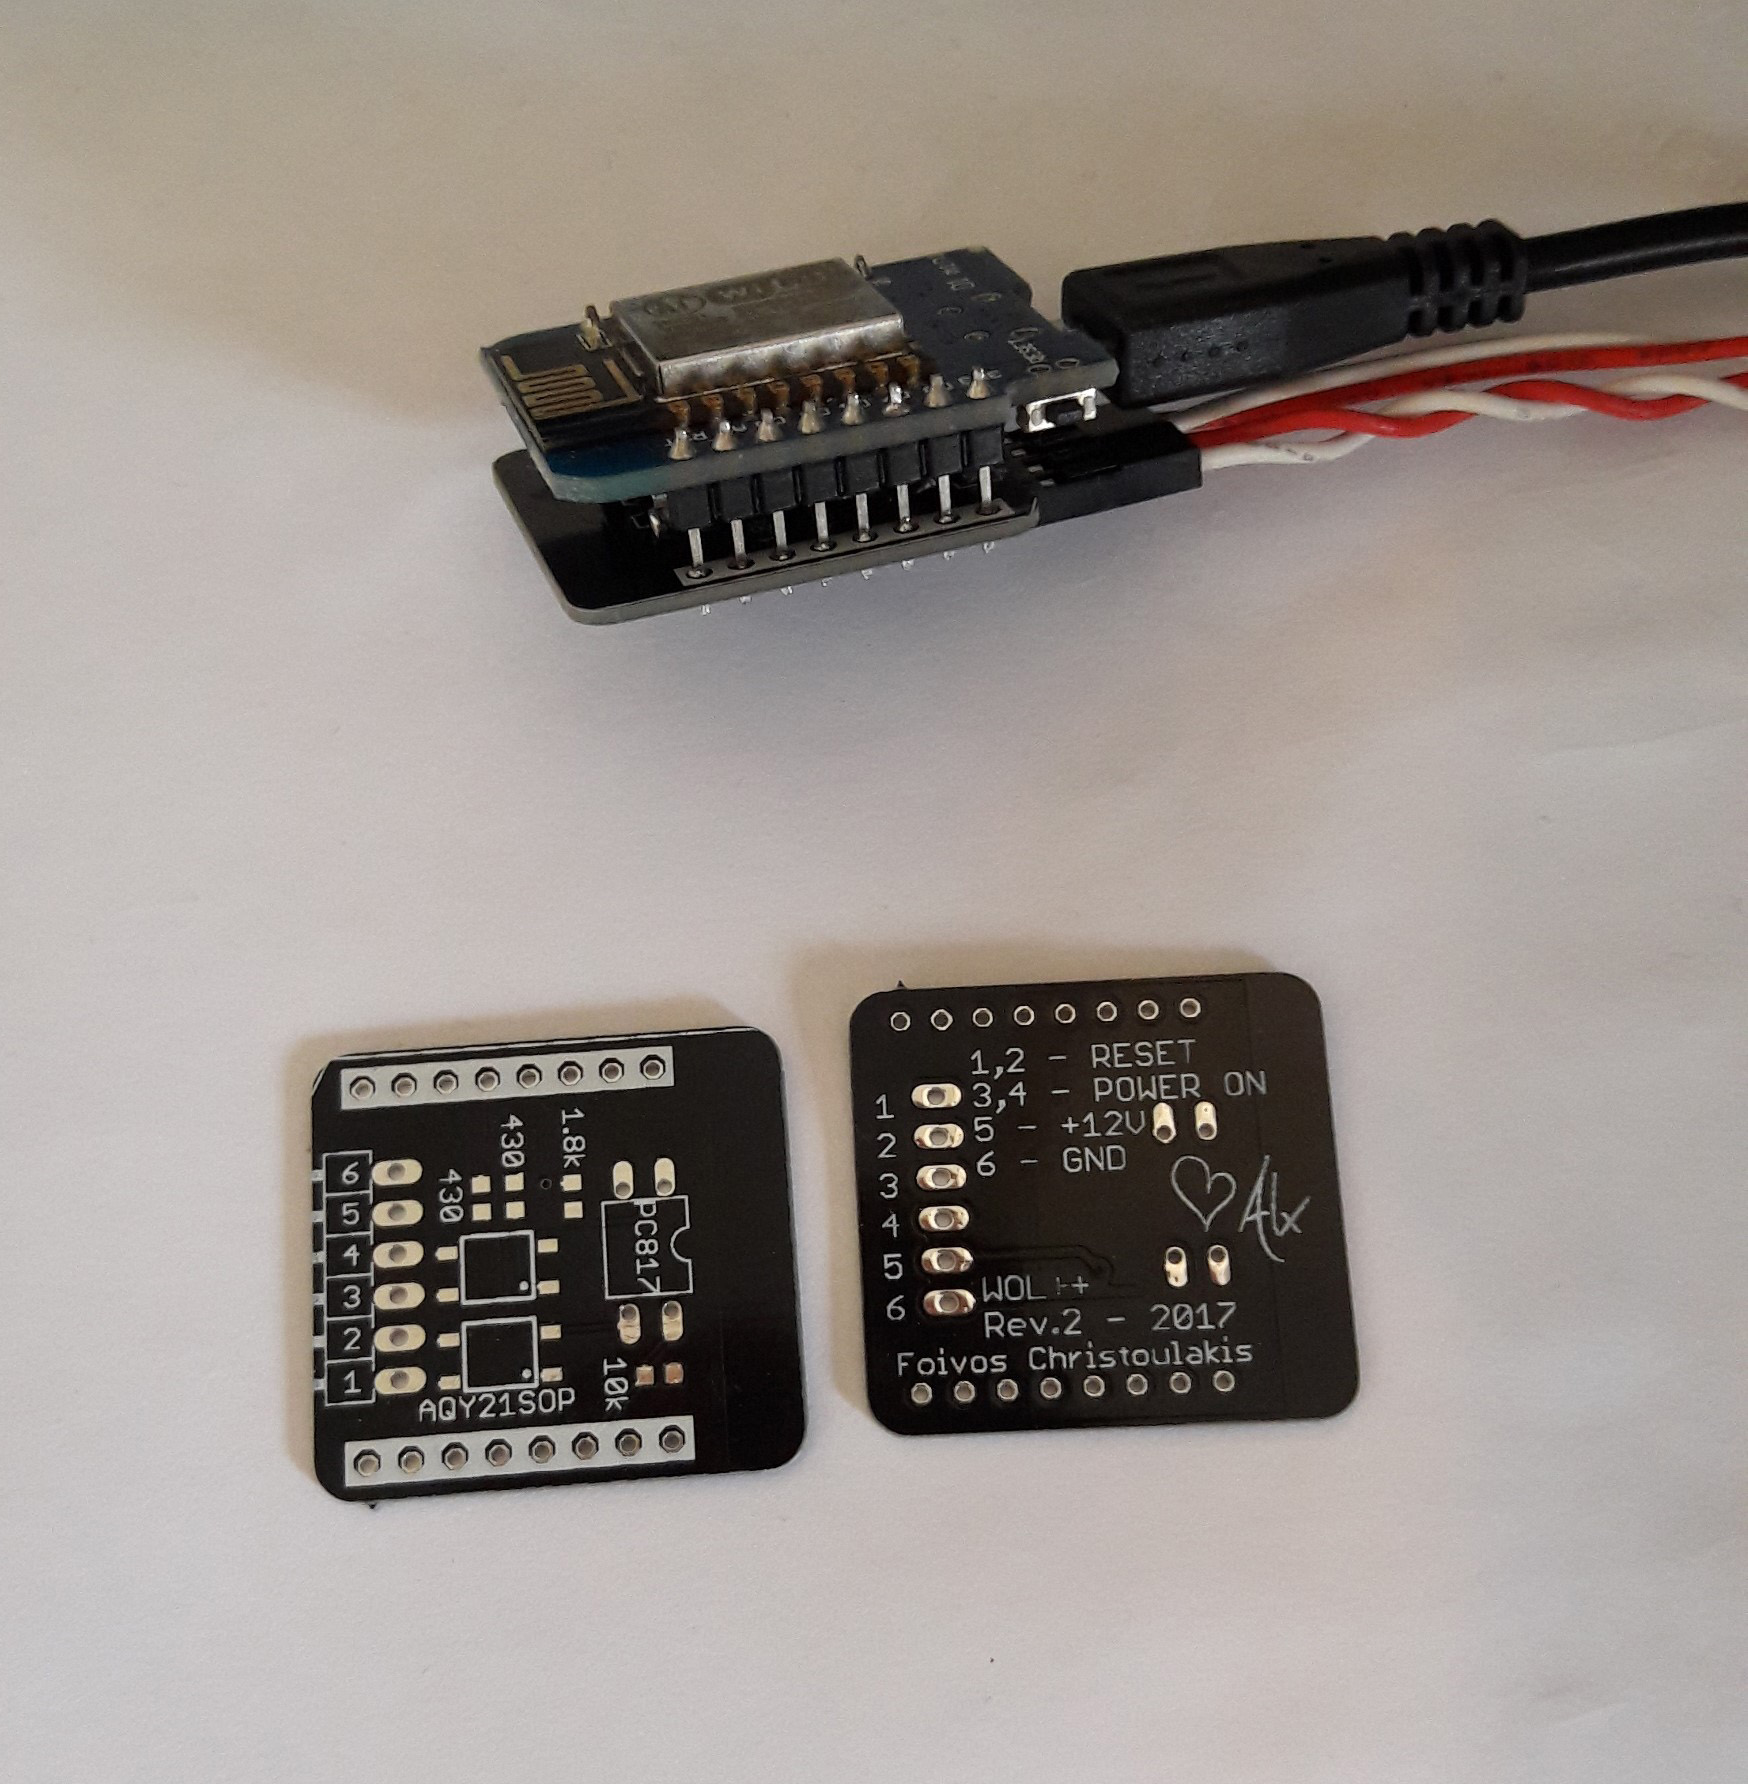
After initial testing, a small PCB was designed to directly interface with an esp8266-based module (wemos D1 mini) resulting on a very small device which can also be fit inside the PC case.
Client Application
An android app was developed for debugging and demonstration purposes of the system. However, the app provides all the client’s side functionality and can also be considered for ordinary use of the system.
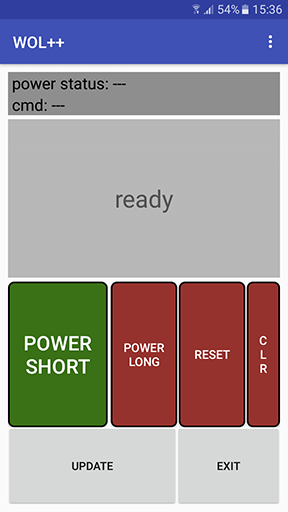
Its main screen is comprised of:
- an indication of the values of the thingspeak fields used
- a
text fieldfor user feedback on the state of the app - a set of buttons triggering the available tasks. There is also a
clearbutton which writes the value ‘0’ on the command field. Normally this is not used but it was implemented for debugging purposes. - An
updatebutton which updates the aforementioned thingspeak fields’ indications and anexitbutton for easy exiting the app.
There is also a settings menu for the user to declare his personal thingspeak channel (thingspeak fields are organized in entities called channels) to be used along with the necessary thingspeak API keys for accessing it.
Here is a demonstration of the remote power on procedure and the feedback provided to the user:
Links
WOLpp android client: